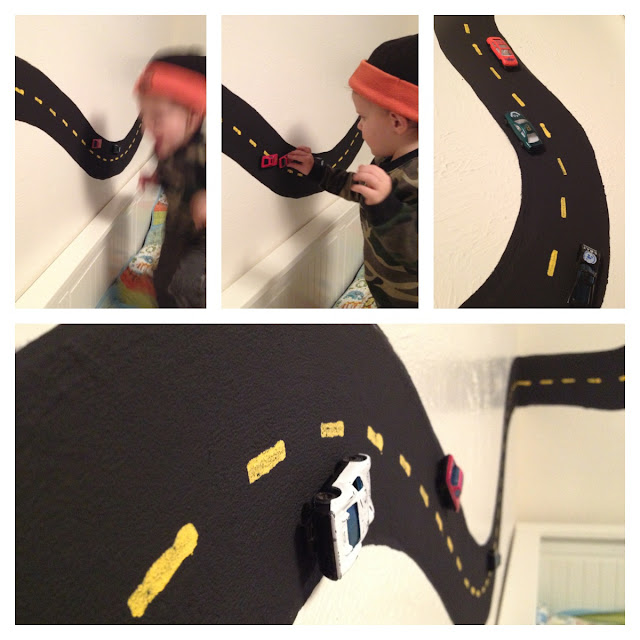
On Friday night I hand sanded a path along the wall and painted the first coat, after a lot of deliberation, I decided to freehand it. I did the main road with a 2" high density foam roller and then did the edges with a 2in paint brush. It took a few hours.....then I tested a magnet out on it and it didn't even act like there was a chance of it ever sticking.......

I decided to read the instructions......weird right! It said to mix well (oops I guess shaking it a few times didn't count). Then I read some reviews online (just to make sure I wasn't wasting my time). One was incredibly helpful. She said that she mixed constantly and only poured a little paint in to her pan at a time. I tried mixing with a paint stick and it literally felt like sludge in the bottom of the can, so I called in the electric mixer and tried again.

After just two coats...magnets were sticking! I did 7 total coats including my first waste of time.
I didn't want to spend a ton of money on the paint for the dotted lines so I went to Lowe's and had them mix me up a sample size tub for just $2.98!
I used a wedge sponge to make the dotted line and I like the roughness.
I decided that I would try long strips of magnets and I found some that I had lying around in our theme week supplies. I also found Evin's lightest, plastic, cheapo cars. Some came from Dollar Tree and some from a multipack at Target. I hot glued the longest strip of magnet that I could possibly make work on the underside of the car and made sure the glue was really thick so that it cleared the wheel base.
Anything heavier than these cheap cars would not work, even some of my fridge magnets didn't work if there wasn't enough surface area to stick.
Evin loved it and got BLURRY excited!
I'll let you know how it holds up!


Woww this is soo cool !! I want to try this in my sons room now 🤗
ReplyDelete